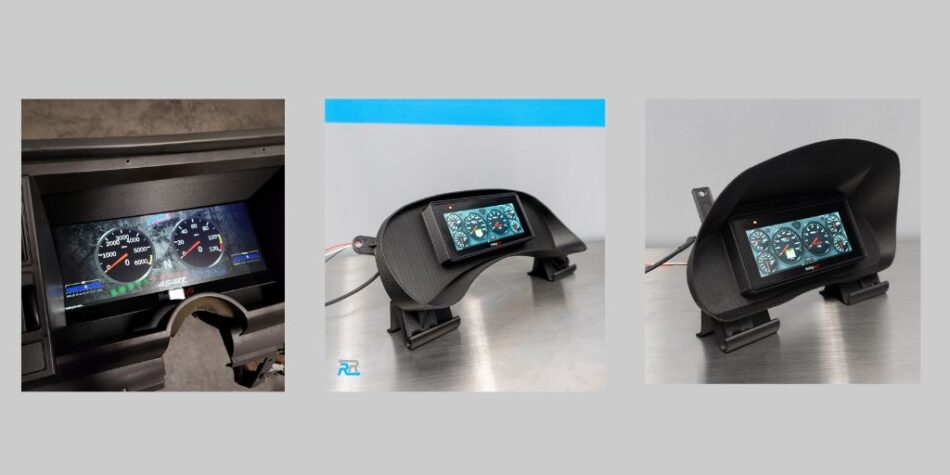
Upgrading to a digital dash is one of the most exciting ways to modernize your vehicle. Whether you drive a classic car, are working on a project truck, or a cruise a daily driver that deserves a refresh, a digital dash can transform how you interact with your car. It offers clear visuals, customizable layouts, and access to data that traditional analog clusters simply cannot display. If you are new to digital dash installations, the process can seem intimidating. With the right preparation and a straightforward plan, even first time upgraders can tackle this project with confidence.
Start by Choosing the Right Digital Dash
Before you pick up any tools, you need to choose the digital dash that fits your vehicle and goals. Some units are designed for performance applications and come with advanced data logging features. Others focus on clean aesthetics and easy plug and play installation. Pay close attention to screen size, mounting style, sensor compatibility, and wiring requirements. This helps you avoid surprises once you begin disassembling your current dashboard.
It is also important to verify that the digital dash you choose supports your vehicle’s signal outputs. Some older vehicles rely on analog senders, while many newer models use CAN based systems. Some modern digital dash units can support both, but checking ahead of time prevents unnecessary rewiring later on.
Prep Your Workspace and Gather Tools
Installing a digital dash is much smoother when you prep your workspace. Disconnect the vehicle battery before touching any wiring. Lay out a clean towel or panel mat to protect interior pieces and remove your factory cluster carefully. In most cases, you will need basic hand tools like screwdrivers, trim removal tools, a wiring crimping set, and electric
Labeling wires as you go is one of the best ways to set yourself up for success. Even if the new digital dash uses a plug and play harness, marking your connections gives you clarity during installation and future troubleshooting.
If you are retrofitting an EFI system to your car, like a Holley or Haltech unit, reach out to them directly for wiring guides. They have a wealth of information and resources for the first time builder.
Mount the Digital Dash Using a Proper Bezel
One of the challenges many installers face is mounting the new digital dash securely in a way that looks clean and factory inspired. Older cars often have unique cluster shapes that do not perfectly match the rectangular screens that most digital dash units use today.
This is where Reversion Raceworks becomes incredibly valuable. They offer replacement bezels specifically designed to help you mount modern digital dash screens into older vehicles. Their bezels make installation easier by providing a precise fit that aligns with your factory interior.
They use high quality 3D scanning technology to ensure accuracy, and the bezels can be trimmed to fit a variety of popular digital dash models. Instead of trying to fabricate your own mount or modify the factory cluster, you can rely on a clean and professional solution that saves time and improves overall appearance.
Wire the Dash Carefully and Test Before Final Assembly
Wiring is the part most beginners worry about, but it becomes manageable when you follow the instructions step by step. Many digital dash kits include labeled harnesses that plug directly into your signals. For older vehicles, you may need to connect wires for speed, RPM, fuel level, coolant temperature, and other sensors. Once again, check with the manufacturer on best practices and diagrams for your specific model.
Reassemble and Enjoy Your New Driving Experience
After testing, reinstall your trim pieces, secure the new bezel, and finalize the dash assembly. Once everything is back in place, you can begin customizing your display layouts. Many digital dashes allow you to change colors, gauge styles, and data arrangement. This gives you a driving experience that feels modern, personal, and perfectly tailored to your needs.
Upgrading to a digital dash may seem like a big step, but with preparation and the right parts, it becomes a rewarding project. Tools like Reversion Raceworks replacement bezels make the installation far easier, especially on older cars that were never designed for modern screens. With patience and attention to detail, your first digital dash upgrade can be a smooth and successful experience.
For more information about Din Kit For 1989 Pontiac Firebird and Gmt800 Parts Please Visit : Reversion Raceworks


